I recomend that you watch this first video, gesso your book, and while it's drying watch all the other videos. Read the instructions and look at the pictures before you take your next step. This will give you some ideas of what you might want to do to your book. I have decided to post the entire workshop at one time. I can't wait to see your progress pictures in the flickr group.
Let the fun begin!
Applying gesso to your book
Let the fun begin!
Applying gesso to your book
Applying the first coat of paint as well as some tissue paper
I am thinning the paint with water. I didn't explain that. Also I keep saying gesso in this video. What I really mean is Mod Podge.
I am thinning the paint with water. I didn't explain that. Also I keep saying gesso in this video. What I really mean is Mod Podge.
Applying more paper as well as cutting out words to place on the front cover
Preparing painted blocks to place the cut out words in
Applying words to cover with Mod Podge
Applying some stamps to the front cover
Completed Cover
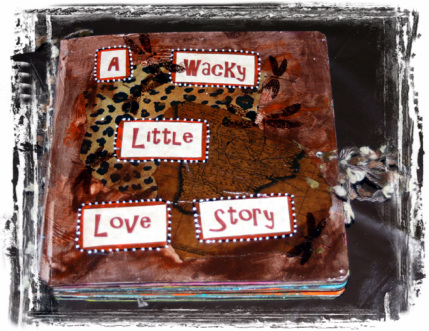
Here is what the cover looks like finished. I used an acrylic pen for the white dots. You can dip the end of a paint brush in paint and make the same dots. I also included some dragon fly stamps.
You will use these same techniques through out the book. Use tissue paper, stamps and whatever else you have found.
You may click on the picture to get a larger view.
Click on More Altered Book Fun (at the top of the page) to continue this workshop
You will use these same techniques through out the book. Use tissue paper, stamps and whatever else you have found.
You may click on the picture to get a larger view.
Click on More Altered Book Fun (at the top of the page) to continue this workshop
